Practical
Difficulty: suitable for beginners
Setup #
Follow the instructions in the Requirements document.
Open a Terminal #
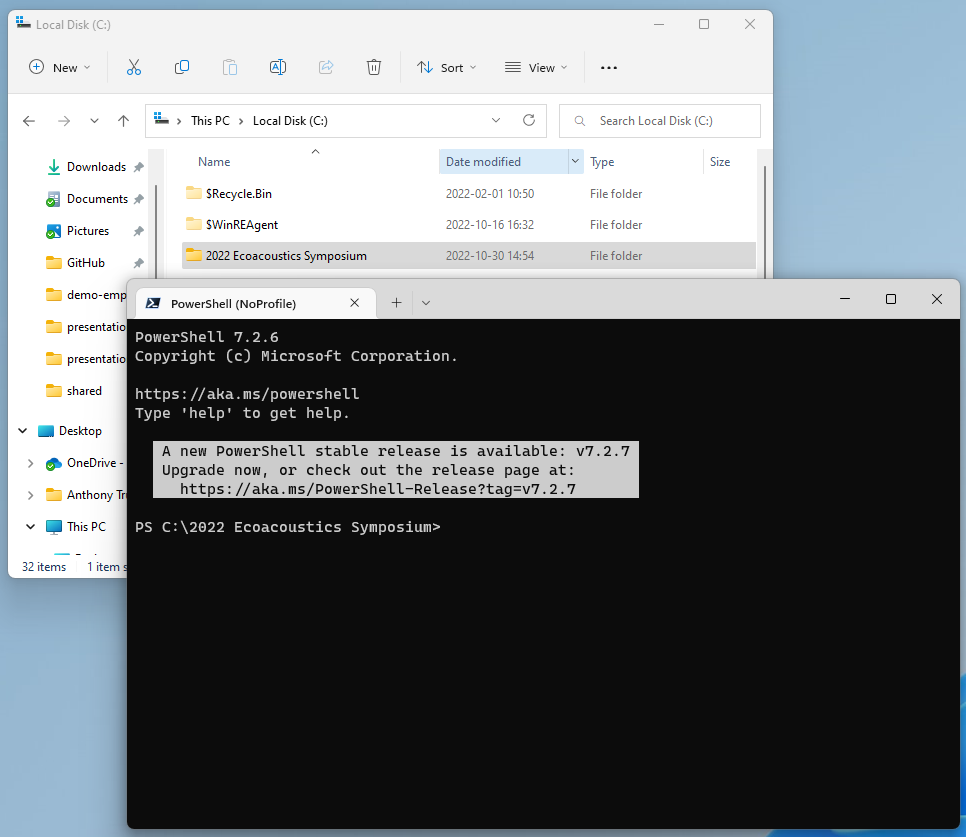
Now open a terminal in the folder where you downloaded the files:
- Open Windows Explorer to the folder where you downloaded the data
- Right click on the folder and choose Open in Terminal

It should look like this:
- Open Windows Explorer to the folder where you downloaded the data
- Right click on the folder and choose Open in Terminal
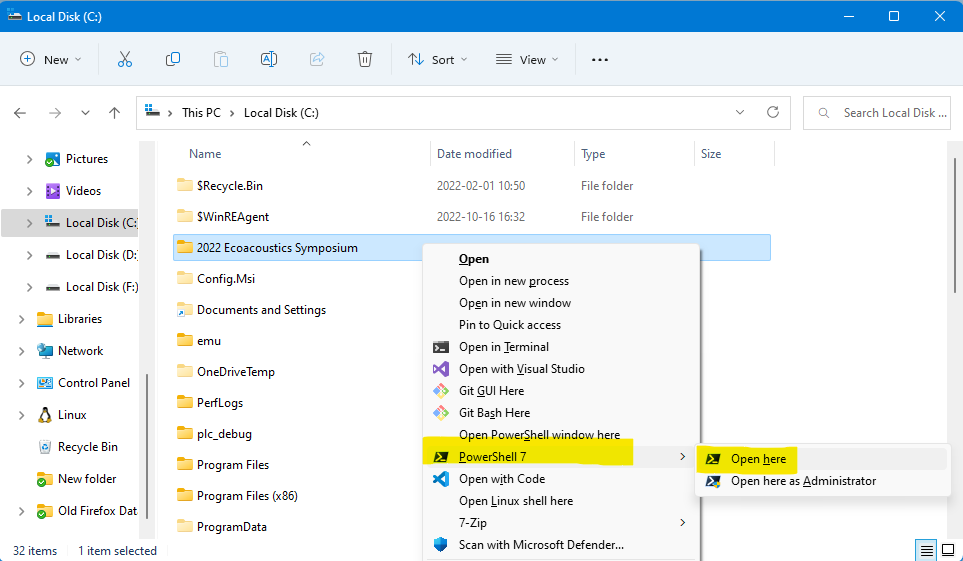
It should look like this:
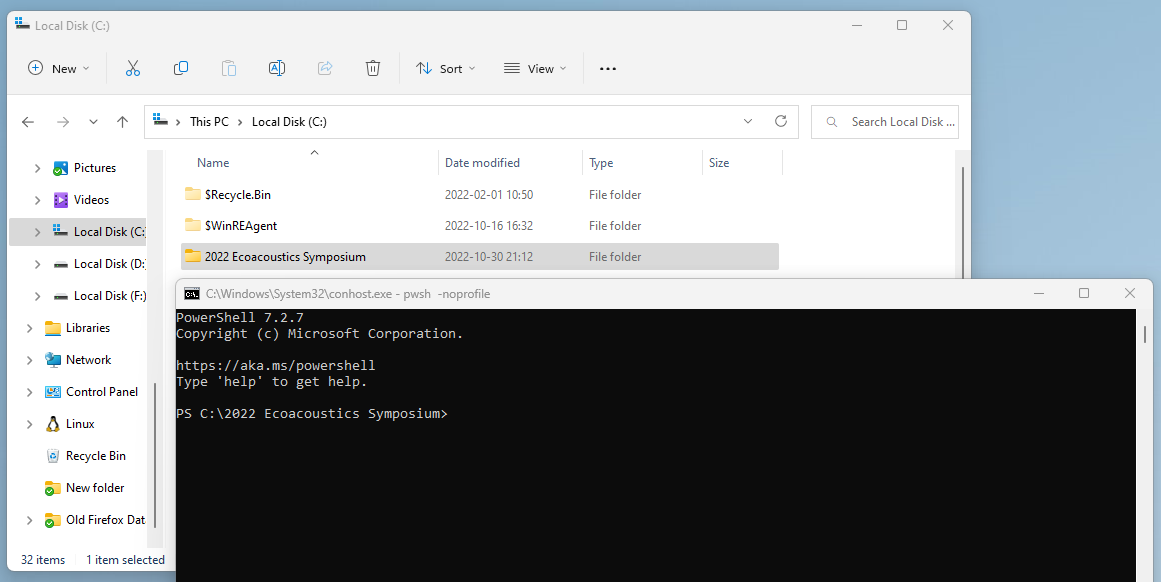
- Open Terminal
cdto the directory of the downloaded workshop materials- e.g.
cd "/2022 Ecoacoustics Symposium"
- e.g.
- Open Terminal
cdto the directory of the downloaded workshop materials- e.g.
cd "/2022 Ecoacoustics Symposium"
- e.g.
Terminal use #
Anytime you see command to run, we’ll present it in a code box that will look like this.
> <command to run>The
>denotes a prompt, which is your cue to run the command after the prompt.For example:
> mkdir resultsYou would type (or copy and paste)
mkdir resultsinto your terminal. Do not include the prompt (the>symbol).To run a command press Enter on your keyboard.
We might include a comment (a line starting with a
#) and we might show you the output of your command as well.# I am a comment > echo "I am output" I am outputOften we will omit the output for brevity.
Previous commands can be run again by using the up and down arrow keys to cycle through those commands.
Lastly, if your terminal reports it cannot find a program you just installed, try closing the terminal, and then reopen it.
Check where Analysis Programs (AP.exe) is installed #
If you followed the install instructions for installing AP, you should be
able to type AP and press Enter in the Terminal.
If successful it should look like this:

If successful, move to the next section. Otherwise, we’ll need to find where AP is installed and copy the path to the program.
To do this:
- Find where `AnalysisPrograms.exe is installed on your computer
- Copy the folder path (the full address of that folder in your computer) by
holding Shift and right clicking on
AnalysisPrograms.exe, then choose Copy as path.
For example, AP is normally installed to C:\Users\%USERNAME%\AP.
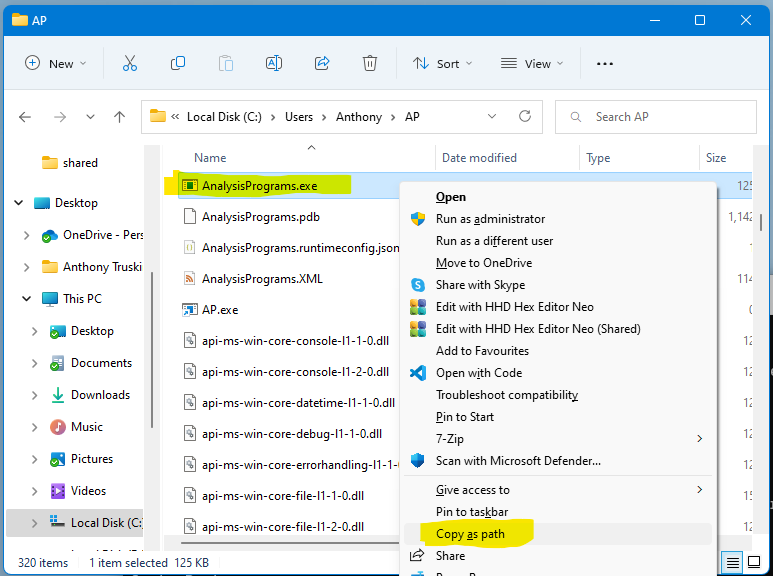
You should end up with a path like "C:\Users\Anthony\AP\AnalysisPrograms.exe".
Paste this somewhere for use later (like in Notepad).
Now, when we want to work with AP we can tell the computer the “address” of the program so it can run it.
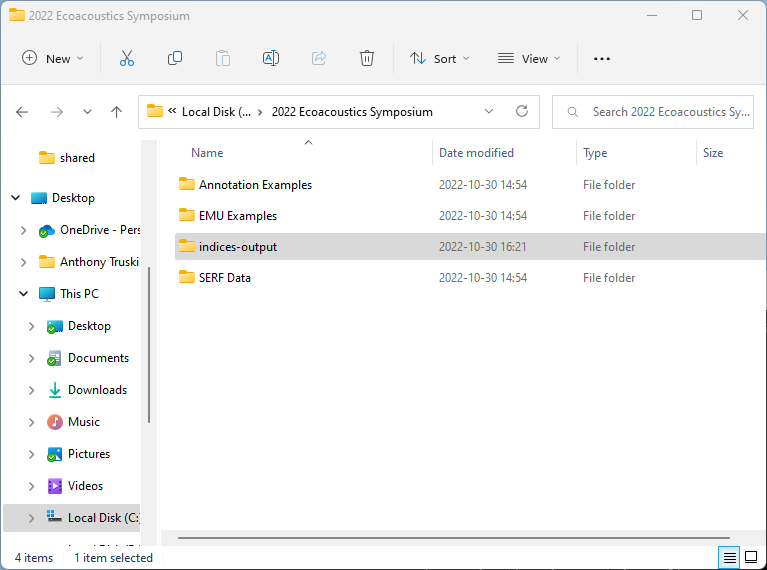
First, let’s get organised #
When dealing with lot’s of data from different locations, it is very easy to get lost—and lose data too. So I like to create folders and organise myself before starting.
Using the method you preferred, create folders to store our results. I like to
have a folder named after the project I am working on
(2022 Ecoacoustics Symposium for example). Today we’re working in a folder
that is directly in the C: drive in my computer for simplicity.
Inside the symposium folder, we have our data which we downloaded. Then we’ll
add one folder called with an identifying name like indices-output. Like this:
Inside my indices-output folder, I’ll always make sure each recording has it’s own folder
for its results. This makes it easy to link results back to the original files.
For example, using the data for today’s demo, I’d create folders like this:
| Audio file | Output folder |
|---|---|
| SERF Data\20220421T220000+1000_SEQP-Samford-Wet-B_644377.flac | indices\20220421T220000+1000_SEQP-Samford-Wet-B_644377 |
| SERF Data\20220421T100000+1000_SEQP-Samford-Wet-B_644370.flac | indices\20220421T100000+1000_SEQP-Samford-Wet-B_644370 |
| SERF Data\20220421T120000+1000_SEQP-Samford-Wet-B_644366.flac | indices\20220421T120000+1000_SEQP-Samford-Wet-B_644366 |
| SERF Data\20220421T140000+1000_SEQP-Samford-Wet-B_644351.flac | indices\20220421T140000+1000_SEQP-Samford-Wet-B_644351 |
| SERF Data\20220421T160000+1000_SEQP-Samford-Wet-B_644347.flac | indices\20220421T160000+1000_SEQP-Samford-Wet-B_644347 |
| SERF Data\20220421T180000+1000_SEQP-Samford-Wet-B_644363.flac | indices\20220421T180000+1000_SEQP-Samford-Wet-B_644363 |
| SERF Data\20220421T200000+1000_SEQP-Samford-Wet-B_644357.flac | indices\20220421T200000+1000_SEQP-Samford-Wet-B_644357 |
Calculating Acoustic Indices for a recording #
Now we will finally calculate acoustic indices!
So, AP is a command line program. This means we have tell the computer everything we want it to do by writing it (instead of clicking how we usually do in programs that have a graphical user interface). We’ll give you the command line for the first recording example, we will run it and then you will do it for the second (and as many as you want after that).
The command is:
> AP audio2csv "C:\2022 Ecoacoustics Symposium\SERF Data\20220421T100000+1000_SEQP-Samford-Wet-B_644370.flac" "Towsey.Acoustic.yml" "C:\2022 Ecoacoustics Symposium\indices-output\20220421T100000+1000_SEQP-Samford-Wet-B_644370"
If you had to do the find where AP is installed step from above, now is the time to use that path you copied and saved. Change the above command to:
# ⬇️--- YOUR PATH HERE -------------------⬇️
> . "C:\Users\Anthony\AP\AnalysisPrograms.exe" audio2csv "C:\2022 Ecoacoustics Symposium\20220421T100000+1000_SEQP-Samford-Wet-B_644370.flac" "Towsey.Acoustic.yml" "C:\2022 Ecoacoustics Symposium\indices-output\20220421T100000+1000_SEQP-Samford-Wet-B_644370"
We’ll explain the above command by breaking it down:
- hey, run this executable program named
AP - and the sub-command
audio2csv- This name
audio2csvmeans we are transforming an audio file in a CSV with acoustic indices
- This name
- analyse this recording
"C:\2022 Ecoacoustics Symposium\SERF Data\20220421T100000+1000_SEQP-Samford-Wet-B_644370.flac"(remember that for the recording you have to tell exactly where it is located - copy the full path to the recording file) - using this configuration file
"Towsey.Acoustic.yml"(the one indicating the configuration for the acoustic indices: which ones should be calculated, the frequency bands, etc et) - and save the output here
"C:\2022 Ecoacoustics Symposium\indices-output\20220421T100000+1000_SEQP-Samford-Wet-B_644370"
Now all the quotation marks, spaces, slashes, etc are important and should be there—if something went wrong double and triple check because there’s probably something missing that you didn’t even realise.
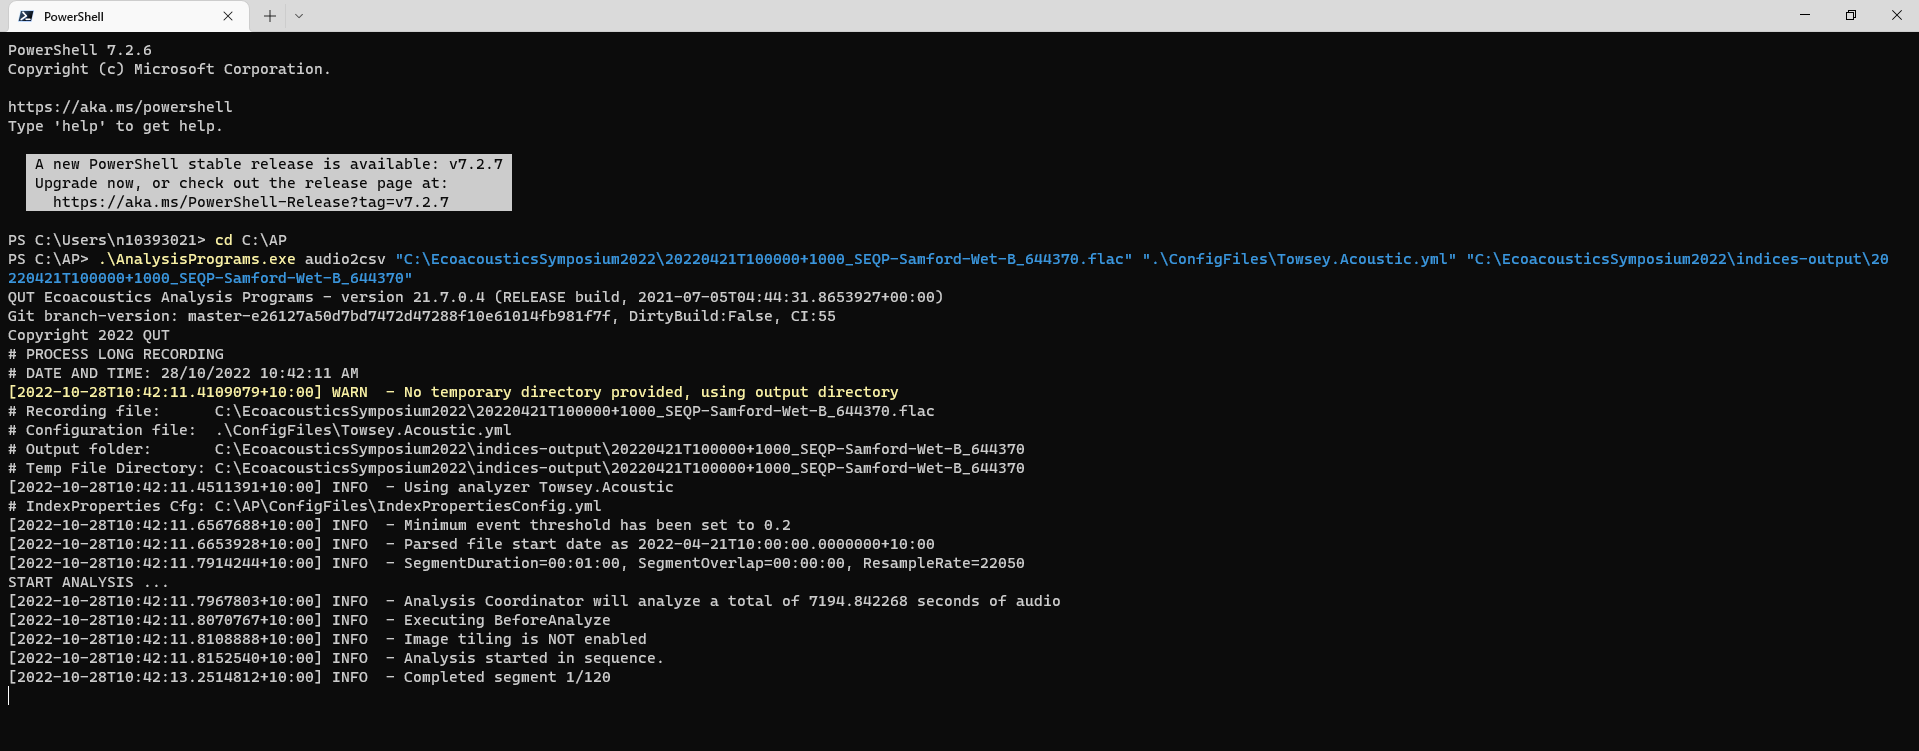
Copy the command and paste it into the terminal. It will look like this in your terminal:

You can paste a command with Ctrl+Shift+V or by right-clicking on the terminal surface.
Now press Enter to run this command and it will look something like this:
The command will take about two to three minutes to run. When it’s done it will look like this:
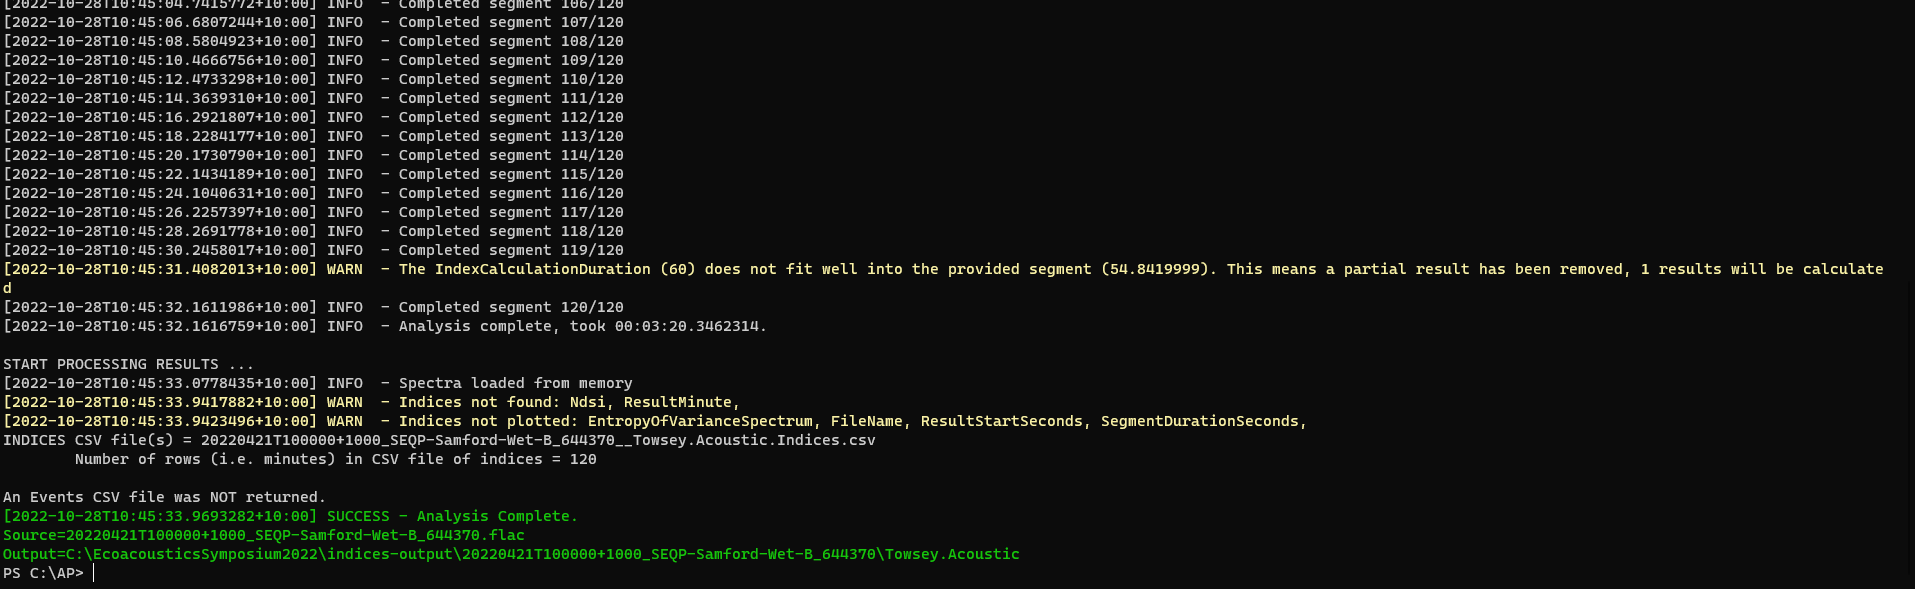
Check if the results are in the output folder. It should look like this:
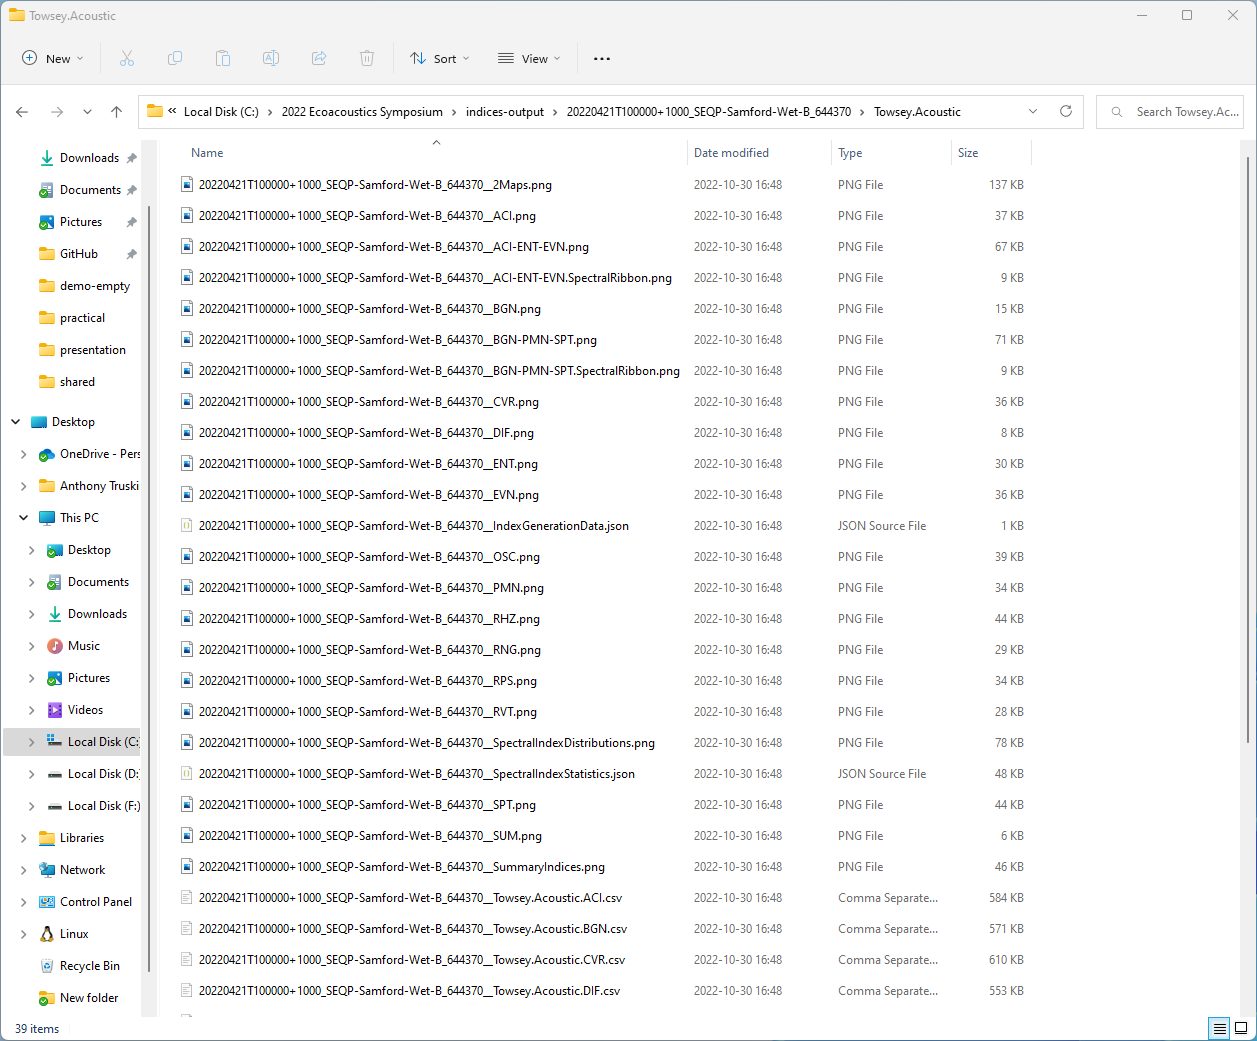
The results should be in the C:\2022 Ecoacoustics Symposium\indices-output\20220421T100000+1000_SEQP-Samford-Wet-B_644370\Towsey.Acoustic folder.
AP calculates acoustic indices for each one-minute of the recording. The
recordings we provided are two hours (120 minutes) long and therefore we should
have 120 values for each acoustic index calculated. These results will be in
the .csv files and .png files.
The CSV files have the actual data that you would use in statistical tests and any analysis. The CSV files that have a three letter capitalised code in them are spectral index files. They have names like:
20220421T100000+1000_SEQP-Samford-Wet-B_644370__Towsey.Acoustic.EVN.csv20220421T100000+1000_SEQP-Samford-Wet-B_644370__Towsey.Acoustic.OSC.csv20220421T100000+1000_SEQP-Samford-Wet-B_644370__Towsey.Acoustic.PMN.csv20220421T100000+1000_SEQP-Samford-Wet-B_644370__Towsey.Acoustic.RHZ.csv20220421T100000+1000_SEQP-Samford-Wet-B_644370__Towsey.Acoustic.RNG.csv20220421T100000+1000_SEQP-Samford-Wet-B_644370__Towsey.Acoustic.RPS.csv20220421T100000+1000_SEQP-Samford-Wet-B_644370__Towsey.Acoustic.RVT.csv20220421T100000+1000_SEQP-Samford-Wet-B_644370__Towsey.Acoustic.SPT.csv20220421T100000+1000_SEQP-Samford-Wet-B_644370__Towsey.Acoustic.SUM.csv20220421T100000+1000_SEQP-Samford-Wet-B_644370__Towsey.Acoustic.ACI.csv20220421T100000+1000_SEQP-Samford-Wet-B_644370__Towsey.Acoustic.BGN.csv20220421T100000+1000_SEQP-Samford-Wet-B_644370__Towsey.Acoustic.CVR.csv20220421T100000+1000_SEQP-Samford-Wet-B_644370__Towsey.Acoustic.DIF.csv20220421T100000+1000_SEQP-Samford-Wet-B_644370__Towsey.Acoustic.ENT.csv
They have the values for each one of the calculated indices per minutes in the
rows of the spreadsheet, and frequency bins in the columns of the spreadsheet.
The default from the configuration file (remember the "Towsey.Acoustic.yml")
is a window of 512 frames (we take 512 samples from the audio to generate our
Fourier transform), resulting in 256 elements (frequency bins). If you open your
file called 20220421T100000+1000_SEQP-Samford-Wet-B_644370__Towsey.Acoustic.ACI.csv,
you’ll see that the spreadsheet has 120 rows and 256 columns, representing the
full spectrum of the recording.
If you’re not interested in the acoustic indices value for each frequency bin, but you want a summary of the recording, with, let’s say, one value of index pe minute (the most commonly used resolution) you’ll find the results in the file
20220421T100000+1000_SEQP-Samford-Wet-B_644370__Towsey.Acoustic.Indices.csv
This is what we call summary indices. Most other research groups just call these acoustic indices, but since we have two types of acoustic indices (spectral and summary) we need two different names.
In this file you’ll find all the acoustic indices values calculated for every
minute. You’ll also have a column called FileName indicating the name of the
file used to calculate these indices (if you have thousands of files and you
merge them, you’ll always know where that value came from); and two columns
indicating the minute within your recording that corresponds to that row:
ResultStartSecondstells you in which second that minute starts (so, a value of120would be indicating that I can seek 120 seconds into my recording and count 60 seconds from there and that corresponds to that result)- and
ResultMinutethat indicates the corresponding minute for that row.
In this way, you can always know exactly how to localise the results in your recording, so if you have something weird going on or something you need to check it is very easy.
Lastly, we have the PNG (.png) image files. AP creates images for most the
individual indices as well as for the spectral indices, and combinations of spectral
indices. The combinations are known as false-colour spectrograms.
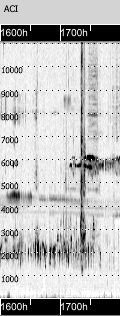
The individual spectral indices are black and white, but they can be very helpful
to identify features in the recording. So, if you know that ACI, for example,
is very good to detect the birds in the environment you’re interested, you can
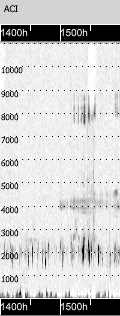
check the file with the ACI.png suffix and see if you have lot’s of activity, like this
or, a file with less activity, like this
Alternatively, you might be interested in looking into the False-Colour Spetrograms
(FCS) and how the combination of indices is looking in your recordings, how well
they are representing biophony, geophony and/or technophony. The files with the
FCS are the ones with the suffixes _2Maps.png or _ACI-ENT-EVN.png
(the indices usually used to represent biophony) and _BGN-PMN-SPT.png
(the indices that usually better represent noise).
Now, if you have the time, try to run the analysis on a different sound file (or all of them) to practice your programming skills
Thank you and I hope this has been useful to start clarifying the world of acoustic indices and soundscape analysis.
More resources #
- There is an extened demo for using AP at https://ap.qut.ecoacoustics.info/tutorials/01-usingap/practical
- If you want to know more about the different types of indices calculated by AP, the default configurations etc see this
file. - If you’re interested in the code, issues and contributing to AP.exe, find out GitHub here
- If you use AP (and want more information on the program, etc) please cite us as found here